
Google Analytics is the best free analytics tool available to all webmasters.
To make the full use of GA, you should know:
- How to properly configure the GA settings to obtain relevant data matching your business goals.
- How to verify the tracking codes so that they work correctly.
- How to link other Google tools such as the Google Search Console with GA to get a complete overview of all your business data in one place.
In addition, you also need to ensure that conversion tracking is working correctly because, without that, you won't be able to calculate the ROI on your marketing investment.
To make things easier, I have prepared this Google Analytics audit checklist to help you perform a complete GA audit to start collecting valuable data for your business growth.
Let's begin by understanding a GA audit.
What is a Google Analytics Audit?
Google Analytics audit is the process of reviewing and configuring the different GA settings to match your marketing goals.
Proper GA audit helps filter spam sessions, internal traffic, and incorrect tracking codes.
Under GA audit, tracking codes are installed on the site, and the data obtained are tested for accuracy by matching it with the data acquired via other analytics tools.
Proper goals are created, and conversion tracking is set up to calculate the number of conversions on the site to ensure it matches the client's goals.
Moreover, custom GA attribution models are set up to identify the channels, pages, products, and services leading toward the sale.
Having such crucial data helps the business make better business decisions leading to improved profits.
How often should you Perform a Google Analytics Audit
When conducting an audit for the first time, you should test the data every day for the first couple of weeks. This will ensure that the data acquired is accurate and spam IPs/sessions are getting property filtered.
Moreover, you can also measure that the conversions are correctly attributed to the channels leading them.
Once you make sure that the data is accurate and all the necessary tracking codes are being set up correctly, you should perform a GA audit every three months to ensure the data being tracked remains accurate and matches the business goals.
Why Conduct a Google Analytics Audit?
The primary purpose of conducting a Google Analytics audit is to confirm that the crucial user data is being collected accurately and there are no loopholes.
A high-level analytics audit ensures optimal data quality.
Here are the top reasons why conducting a Google Analytics audit is necessary:
- It lets you align your goals with data to minimize risk because you can review large volumes of data in seconds and decide whether your marketing campaigns are generating profits.
- GA audit helps you find new opportunities to improve the performance of your website.
- Performing a GA audit helps you find errors in tracking code implementation. Incorrect code might lead to ad spend wastage because, without proper attribution tracking, you might never know the actual ROI of your advertising campaigns.
- You can easily detect any anomalies in data so that the data from every traffic source remains synced to your business goals.
- An effective GA audit helps to improve the efficiency of your marketing and sales teams because it allows you to acquire data sets based on your marketing and sales team KPIs leading to increased productivity.
- By minimizing data inaccuracies, GA audit ensures that the reports are easily digestible for decision-makers.
Overall, a comprehensive GA audit helps maintain the data quality and gives you the confidence that the data is true and accurate.
What do you need to Conduct a Google Analytics Audit
Here are the things you need to perform a GA audit:
- A website (it can be yours or your client’s)
- A GA account with proper tracking code installed on the site
- Admin access to the GA account in case you are conducting an audit on behalf of your client
Google Analytics Audit Checklist
A checklist is always handy before you begin a GA audit.
Here is the complete GA audit checklist to perform a comprehensive audit:
Check GA Property Settings
When you create a new Google Analytics property, you should ensure that every single setting is accurate as per your needs.
Go to Admin > Property Settings to find all the configuration options.
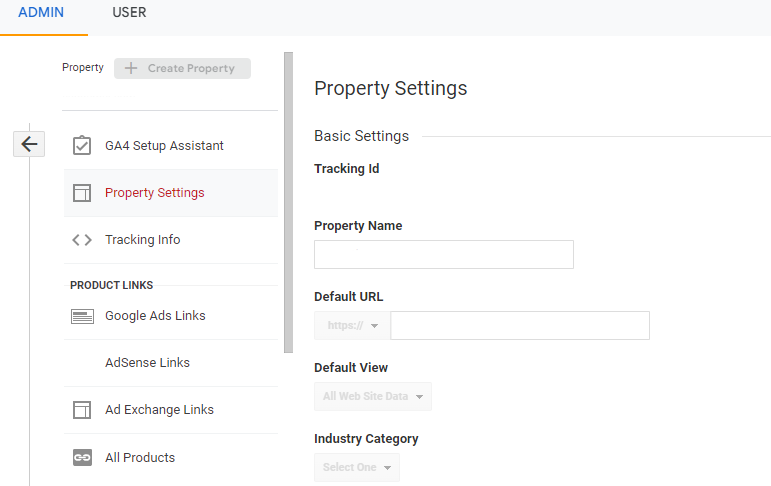
Tracking ID: First, you will see your property’s tracking ID that is added to your website backend.
Property Name: In this section, you can see your property name.
Default URL: It is the URL of your website.
Industry Category: In this option, you need to select your business category from the available options.
Enable Demographics and Interest Reports: You can enable this setting to track age, gender, and interest data in Google Analytics.
Use Enhanced Link Attribution: Enhanced link attribution allows Google to better track links on your page.
Search History: Using this setting, you can remove all the Google Analytics search history.
Enable Users Metric in Reporting: This setting is enabled by default by Analytics to add user metrics to the reports.
Verify Tracking Code is Implemented Correctly
The easiest method to verify the tracking code is to check if the tracking code (with tracking ID) is present in your website’s source code or not.
To check it, open your site on any browser and click CTRL+U on your keyword. Once done, you will get redirected to the source code of your site. Now, search for the website tracking ID (identified in step 1 above) using CTRL+F.
Here is what the code looks like:
![]()
It should be present in the head section.
If you can’t see the tracking ID, then your code is not implemented correctly on the website.
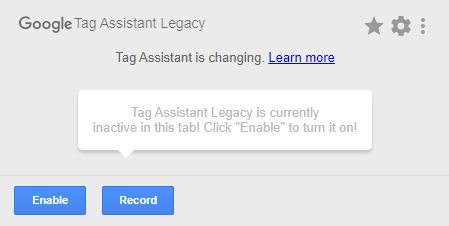
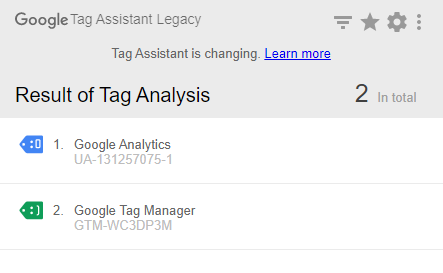
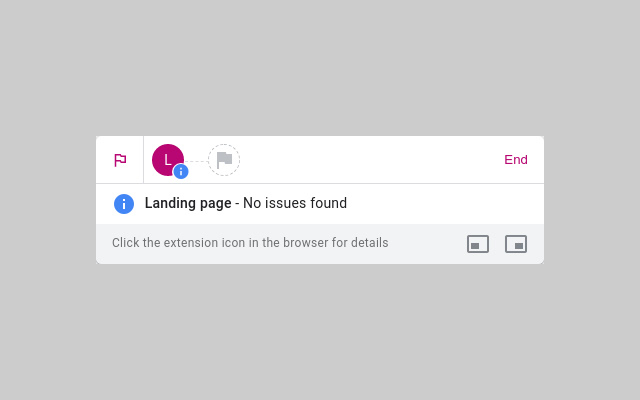
Alternatively, you can also verify the GA tracking code using the Tag Assistant Legacy Chrome extension by Google.

Once you install the extension, simply click on it from the extension bar in your Chrome browser and click on the enable button, as shown in the image below.
Once enabled, you have to reload the website on which you wish to verify the tracking code.
Now, again click on the Tag Assistant icon, and you will see your tracking codes in blue and green colors. If you see green color, it means everything is good, and the codes are working fine.
Check Referral Exclusion List
Google Analytics lets you know the sources of your site visitors like social media, search engines, email, direct, and other referral sources.
This information is crucial to attribute conversion to a specific channel.
However, sometimes you see inaccurate data in referral traffic. For example, you might see your website's payment gateway as a source of referral traffic.
The referral exclusion list allows you to exclude sessions or traffic from any domains that generate inaccurate sessions.
To create a referral exclusion list:
First, open GA and navigate to Admin > Tracking Info > Referral Exclusion list, as shown in the image below.

Now, click on the Add Referral Exclusion option and enter the domain you want to exclude from the referral traffic source. For example, I am adding paypal.com.
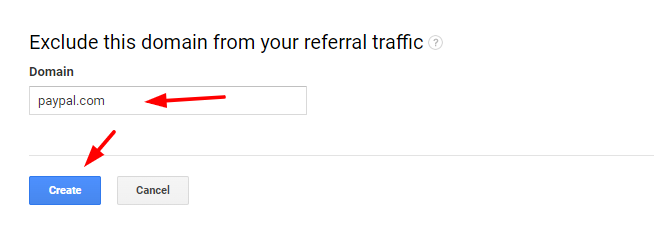
Now, Google won’t count Paypal.com as a source of referral traffic.
You should thoroughly check the sources of referral traffic and add the domains you wish to exclude to the referral exclusion list.
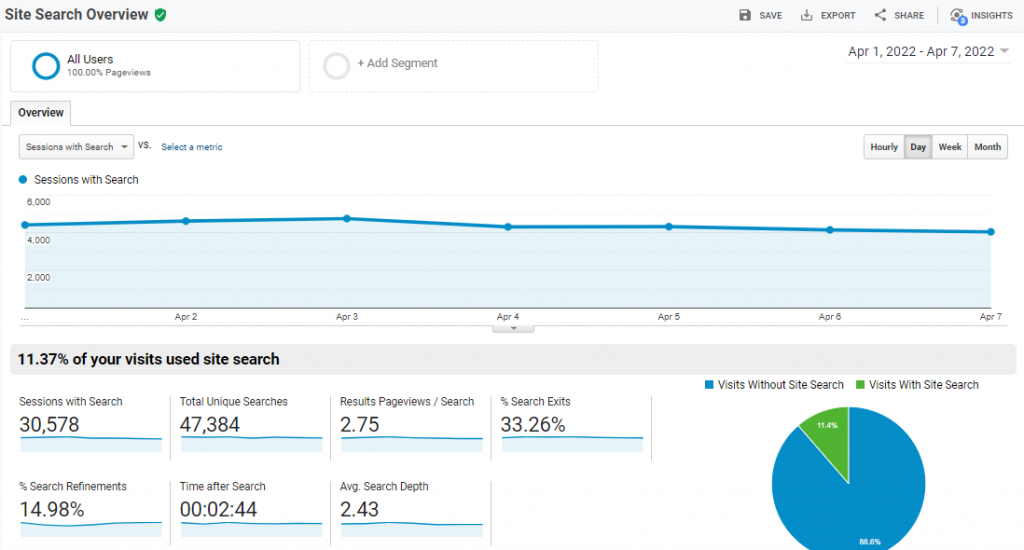
Add Site Search
Site Search analyzes how the visitors are interacting with your website's search functionality, which you can use to determine what users are actually looking for.
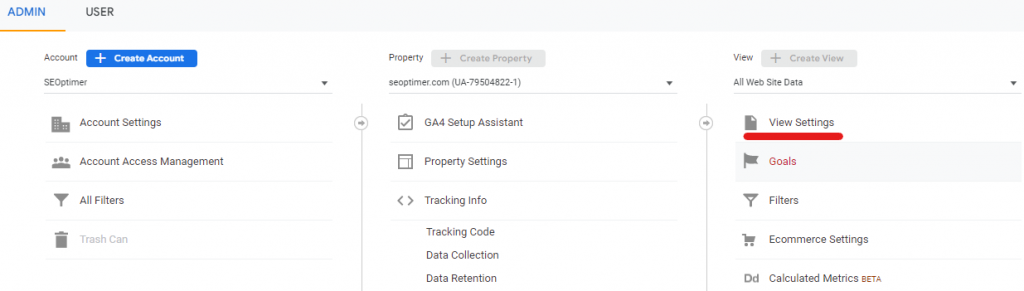
To add Site Search in GA:
First, open your GA account, go to Admin, and navigate to the View Settings, as shown in the image below.
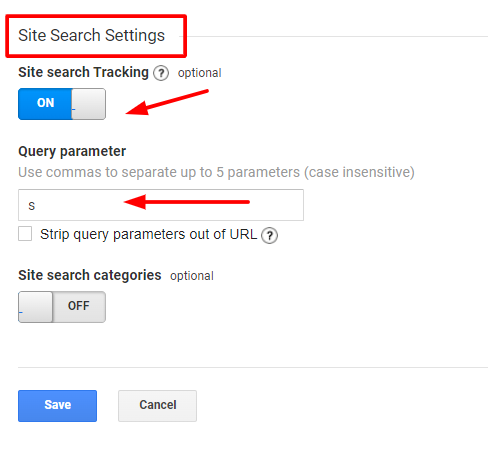
Now, scroll down to Site Search Settings and set the Site Search Tracking to ON.
Once you enable Site Search, you will be asked to enter the Query parameter you use on your site so Analytics can identify your users' search queries.
You can add up to 5 parameters.
To see the Site Search data on Google Analytics, navigate to Behavior and open Site Search reports, as shown in the image below.
Bot Filtering
Bots behave similar to humans and hence can affect data quality.
For instance, if 20% of your site traffic is bots, you might not get a clear picture of your traffic to conversion ratio and your returns on investment.
To solve this problem, you can use bot filtering.
Navigate to Admin > Property > View Setting.
Now, check the box of Bot Filtering.
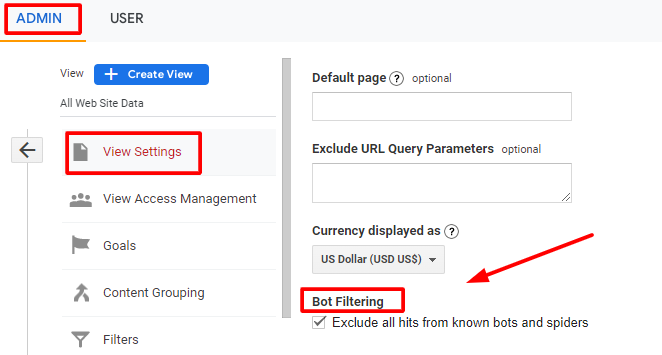
This will filter traffic from known bots.
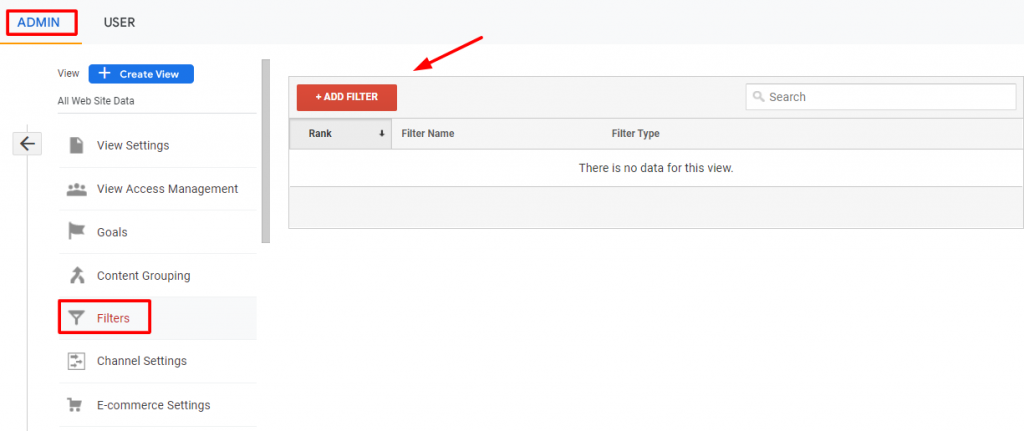
To filter unknown bots, you need to set up a filter:
Go to Admin in GA and open the Filters option under the View Settings, as shown in the image below.
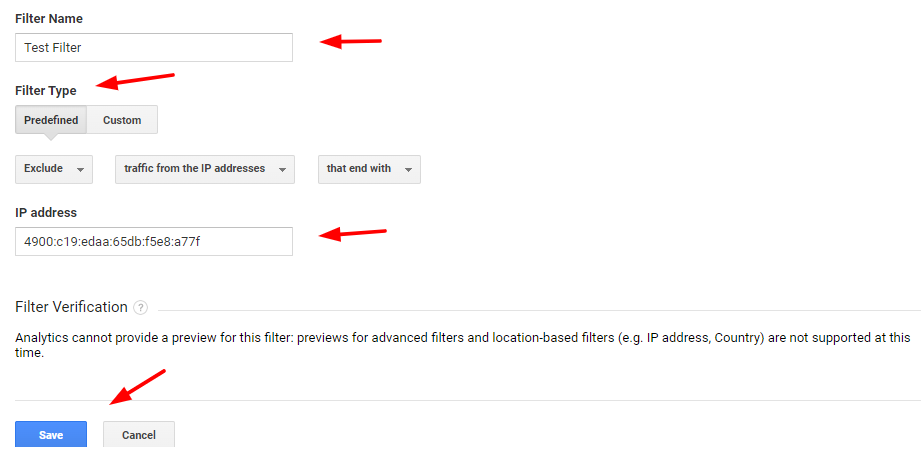
Name the filter, select the type of the filter, and select the source or destination (for example, you can exclude traffic from any specific IP address).
To check if your filter is working or not, you can compare the new traffic data with the previous data.
Enable Demographics and Interest Reports
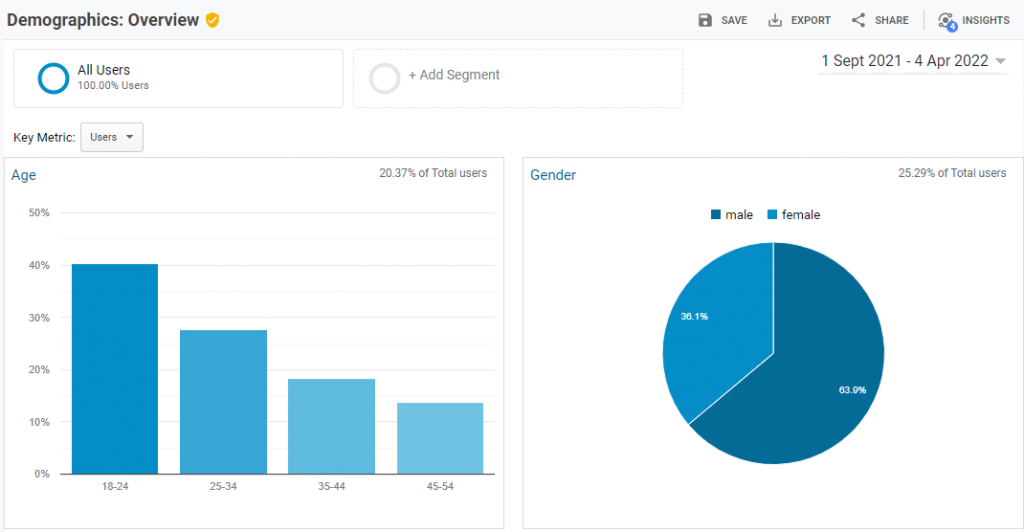
Demographics and Interest Reports collect information about your visitors' gender, age, and interests.
To access the data, visit Audience > Demographics.
Here, you can see the overview of the Demographics data, like the average age of your visitors and how many percent of your visitors are male or female.
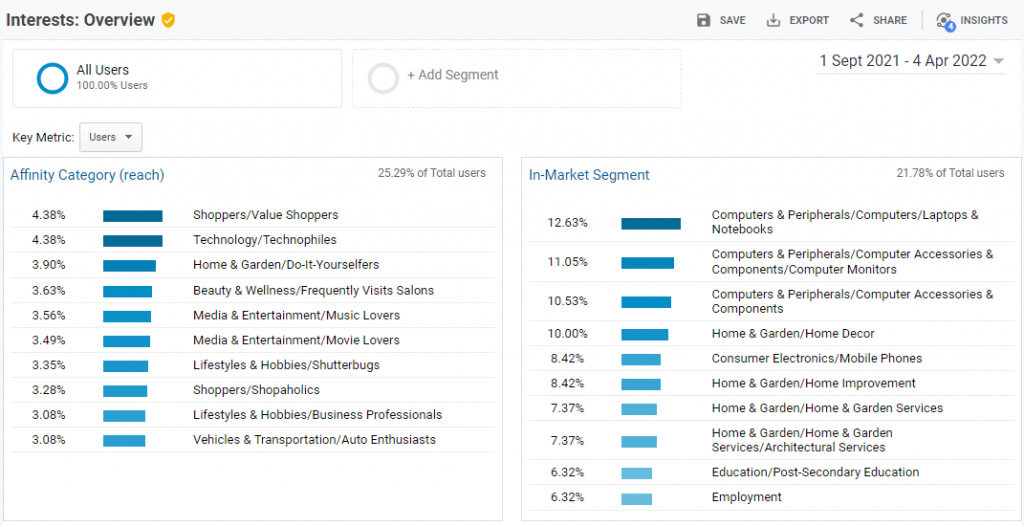
In the Audience report, you can find the Interest report that shows the interests of visitors.
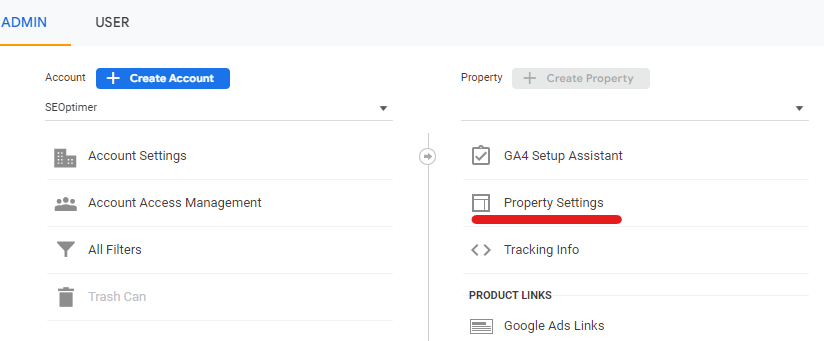
To enable GA to show you the demographics and interests data accurately, go to the Admin section.

Now, navigate to Accounts Settings and open Property Settings.
Under Advertising Features, switch ON the Demographics and Interest Reports as shown in the image below.
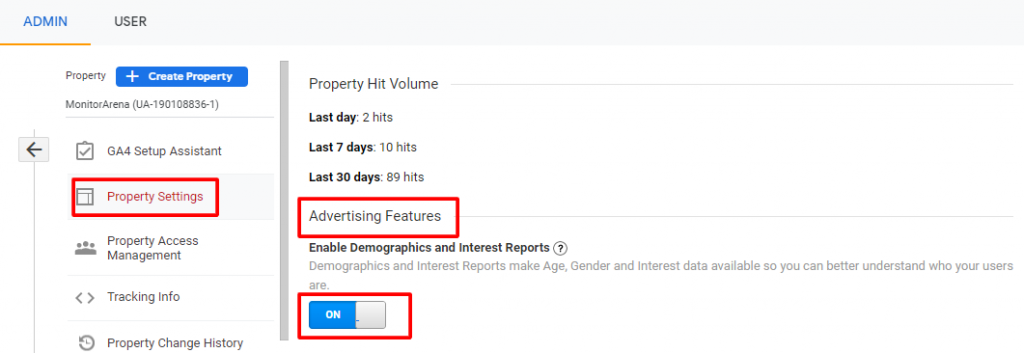
This will enable you to view all the demographics and interests data accurately in your dashboard.
Check all Google Tools are Properly Linked to GA
If you are using more than one Google product for your business, you should link them to your Google Analytics as it helps you see a complete picture of your website performance.
To check the products linked to your GA account, visit All Products under Product Links, shown in the image below.

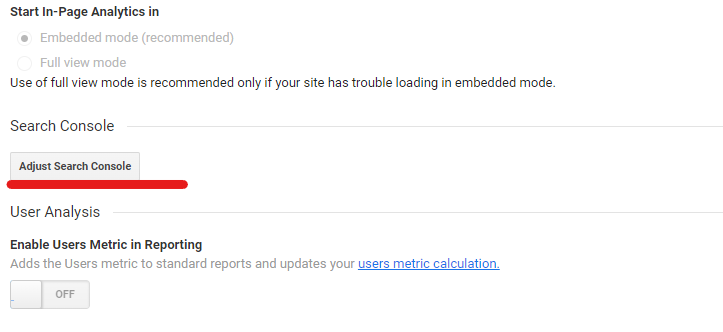
If you can’t see Search Console linked to your GA account, you can open Property Settings under Admin and click on Adjust Search Console.
On the next screen, select the Add option as shown in the image below.
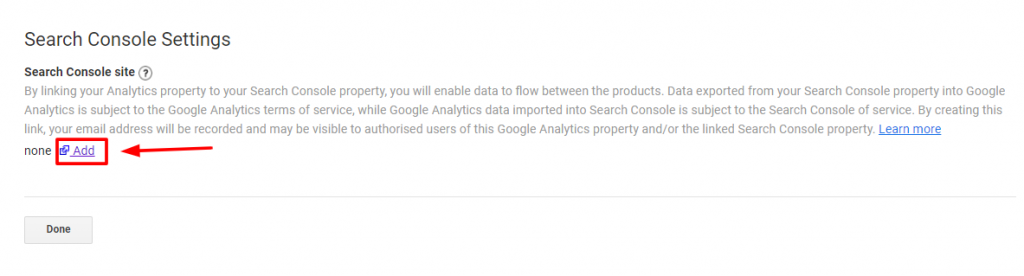
Once you click on the add option, you will be redirected to a new page where you have to select your property (website).
You will be asked to confirm the association with Google Analytics. Click on the Associate button. Once done, you can see the Search Console data in your GA account.
Ensure Goals have been Created
A Goal is a unique feature in Google Analytics that allows webmasters to measure how often users complete specific actions on the website.
Examples of goals include:
- Filling or submitting the contact form.
- Making a purchase.
- Completing any specific action that you can count as micro or macro conversion.
Setting goals allows GA to provide you with crucial information regarding the number of conversions happening on your site and the conversion rate.
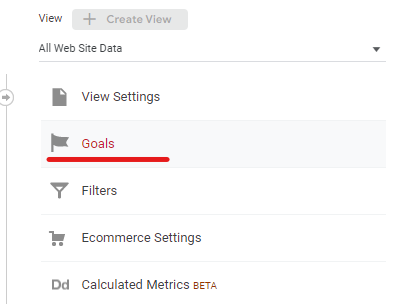
To create goals, open Google Analytics and click on Admin.
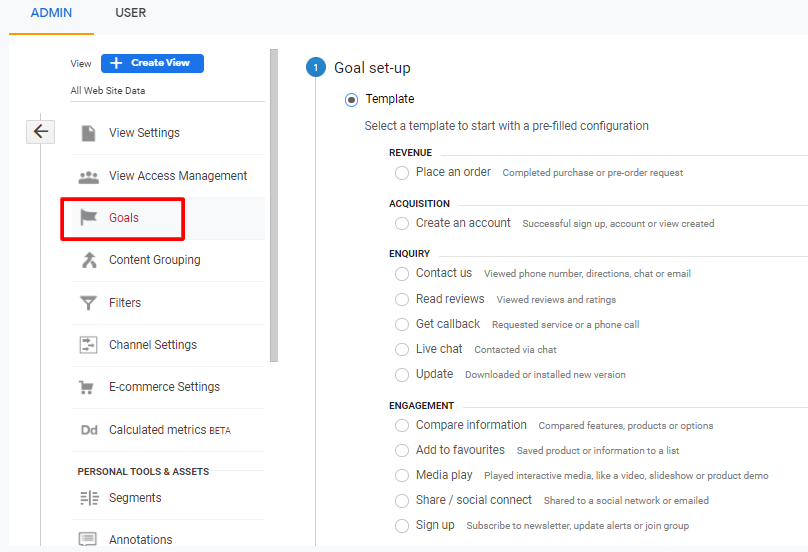
Now, click on Goals under View.
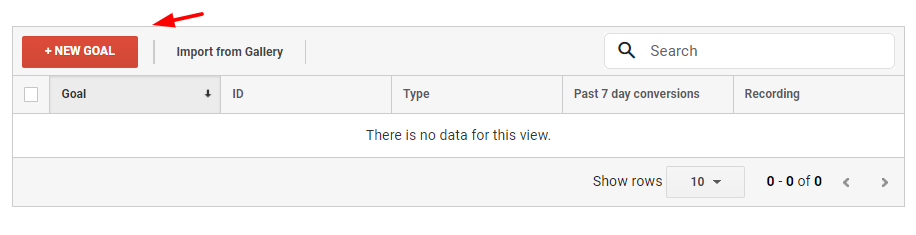
Thereafter, click on the New Goal option.
Now select the template you would like to use to track goal completions.
There are different goal options to track. You can select the one matching your business needs.
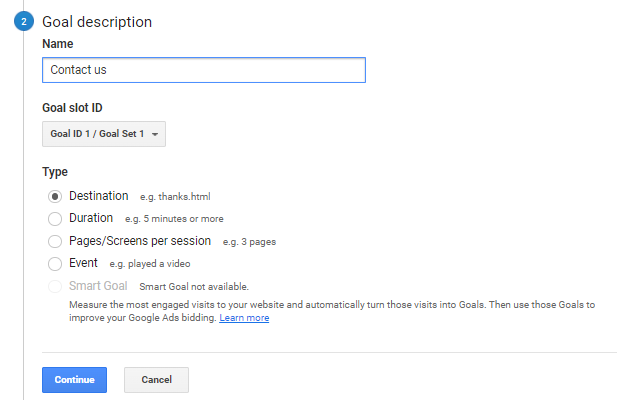
Now, give your goal a name, assign an ID, and select the type of goal. In the goal type, you can choose between any of these options:
- Destination: To track any specific page action like thank you page.
- Duration: To track sessions that last for a particular duration.
- Pages/Screens per session: To track any specific pages the visitor views.
- Event: To track sessions for events like playing a video.
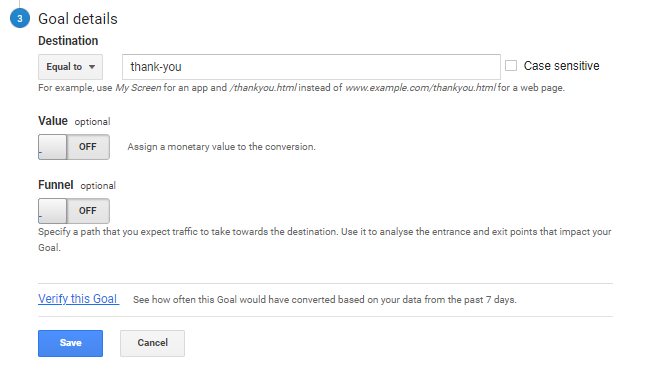
Thereafter, specify the destination URL and save your goal.
Once goals are created, you should check if GA is able to track the conversions accurately. This is explained in the next step.
Check if the Conversion Tracking is Working
Install the Tag Assistant for Conversions in your Chrome browser.
The Tag Assistant for Conversions will help you validate your website conversion tracking.

Once the extension is installed, open it through the extension bar in Chrome and complete a goal.
Tag Assistant will automatically validate the tag setup.
If there are any issues with the conversion tracking, you can detect the type of error and take actions to fix the issue.
Configure Reports
Once you have added your website as a Property and created specific Goals to track user actions, you can start viewing the data.
Here are the essential reports you should configure:
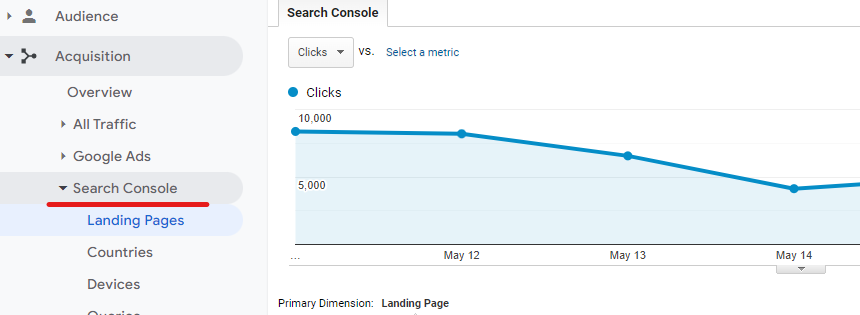
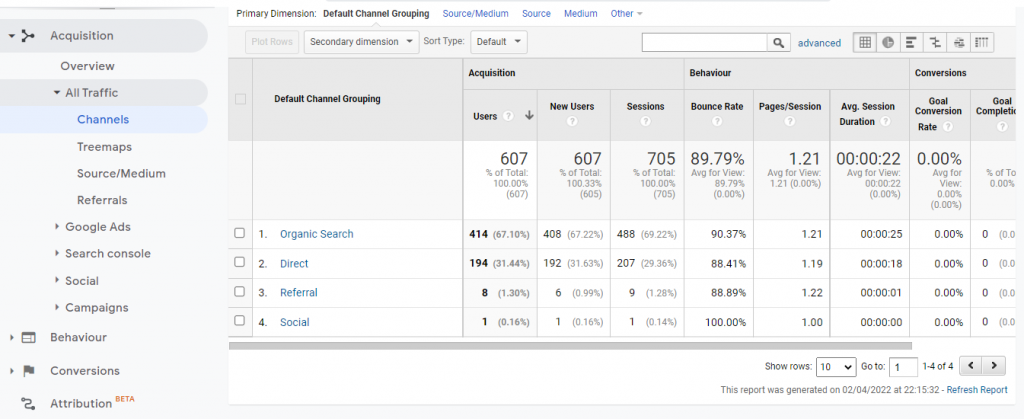
Acquisition Reports: In this report, you can track the sources of your website traffic classified under:
- Organic Search
- Direct
- Paid Search
- Display
- Social
- Referral
- Affiliates
- Other Advertising
- (Other)
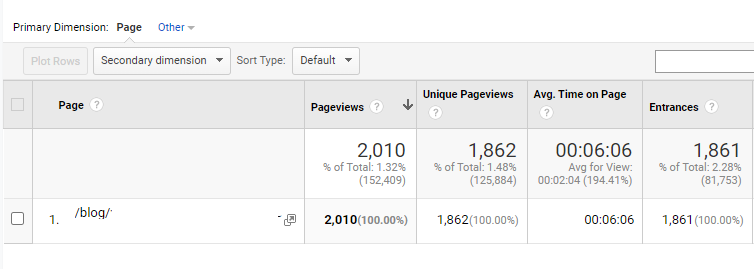
Behavior Reports: This report allows you to check users' behavior on your web pages, like the number of page views, bounce rate, exit rate, and average time spent on a page.

Moreover, you can also see the visitors' actions on your site, like link clicks, button clicks, and different form submissions.
You can check the visitor behavior information of any particular URL, as shown in the image below.
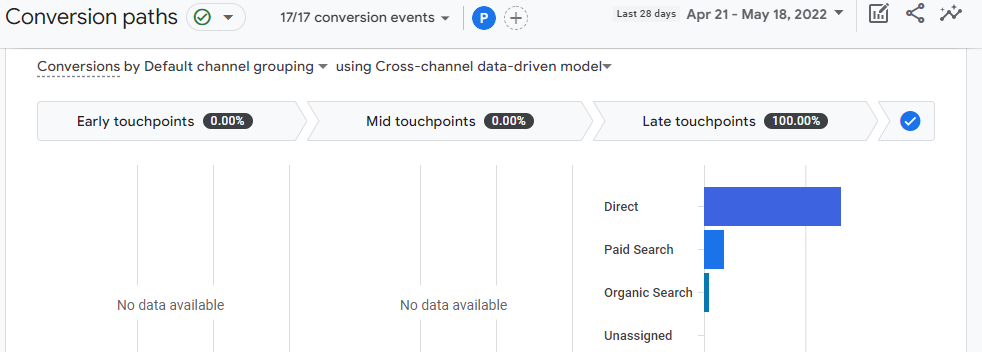
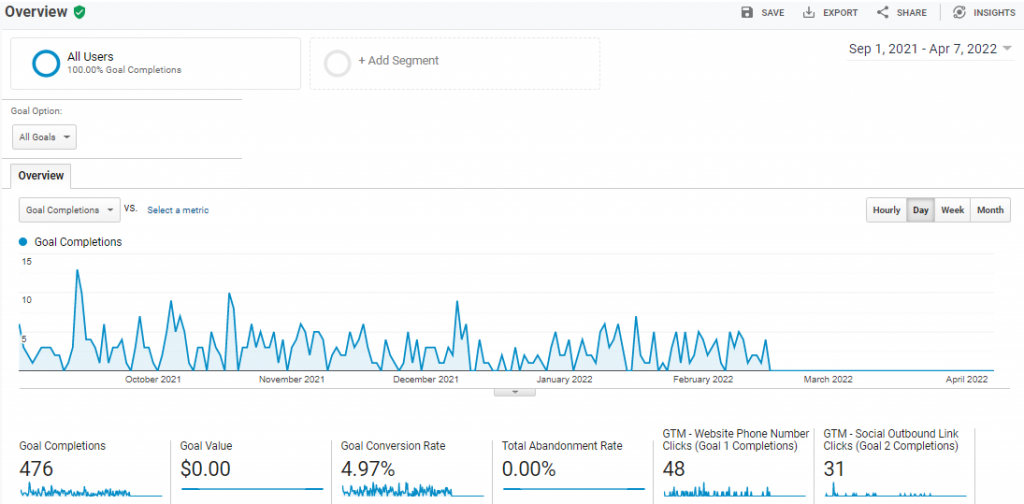
Conversions Reports: In this report, you can check the performance of your goals. Using this report, you can see which products perform better and which users move toward the buying funnel.
Free Google Analytics Audit Template
To help you perform a GA audit, here is a sample Google Analytics Audit template. You can use this sample as your GA audit checklist so that you don’t miss any of the sections provided in this article.
Conclusion
Performing great audits requires time and effort. I have made it easier for you to perform a comprehensive GA audit using the GA analytics audit template provided in this article.
Remember, exceptional marketing campaigns always rely on successful Analytics data. The first step of your marketing campaign ROI calculation is an analytics audit.
Perform your analytics audit by following the steps and template discussed in this article, and make sure you re-perform an audit every three months to ensure data accuracy.